

")


Navigating Your Cpanel and Hosting
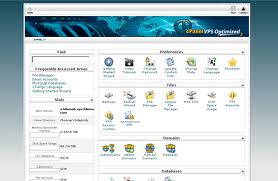
Tutorial to using Cpanel to manage your web hosting account. We can’t cover every single thing that Cpanel. This is a beginner’s tutorial to using Cpanelto manage your web hosting account. We can’t cover every single thing that Cpanel can do, because it’s just too complex. It’s so complex that many people are afraid to even use it.
It can certainly be a bit scary for anyone who hasn’t used it before. Technical people pick it up pretty quickly, but non-technical people usually stick to using only the most basic features to avoid confusing themselves.
Let’s go over some of the most common things you may need to use it for. First,
you can add a domain to your hosting account. After you log into Cpanel, click “Addon Domains.” Where it says “New Domain Name,” enter your domain name with the format yourdomainname.com.
Then add the name of the subdirectory and username you want to use as your FTP login. This will be the directory where your website is stored on the server, and also your FTP username. Use something easy to remember, but not “yourdomainname.”
You don’t want to make it easy for hackers to find out your username. Then simply enter the password you wish to use for FTP and click the button that says “Add Domain!”Now you’ll be able to log in to the FTP account using the username and password you just set up.
Just remember, the domain name won’t resolve until you change the name servers in your domain account to point to the correct name servers. You’ll have to do that by logging in wherever you purchased the domain and finding the name server section for that domain.
The next thing you need to learn how to do is set up a MySQL database. From within Cpanel, click on the button that reads “MySQL Databases.” Enter the name of the database you want to create. If you’re creating a database for WordPress on a domain called LittleBlueCookie.com, you might call it “wplbc.” Then click on the button that reads, “Add Db.”
After the database is created, you have to set up the username and password. It will automatically take you back to the page where you can do this, so enter a username and password in the fields and submit it. Do NOT name your username the same thing as your database. That’s just making it easier for hackers to get into your database.
Make sure to add the user to the database. So many people forget to do this, and then they wonder why their scripts don’t work. You MUST add the user to the database. Use the dropdown boxes to select the username, then the database name. Tick the box to add all privileges for the user. Then click the button that says, “Add User to Db.”
Finally, you’ll probably want to set up an email address for your domain. To do this, click “Mail.” Then click the small link at the bottom that says, “Add Account.” Enter the name you wish to use, and then use the dropdown menu to select the domain you wish that email address to be set up for.
If you want the email address johndoe@yourdomainnname.com, enter johndoe in the name area, and select the proper domain. Next, enter a password that’s hard to guess, but make sure you write it down.
Leave the quota blank if you want the amount of space the email can take up to be limited only by your web space. That’s it! Your new email is ready to use. As you get comfortable with one feature of cpanel, see what the others have to offer.
There are many exciting elements, like being able to add a blog, add a forum, and check your web page statistics, to name a few. None of them are difficult to manage once you know the step-by-step details to follow.